Wednesday, February 29, 2012

Strawberries & Cream Empanadas

I had a basket of strawberries and I didnt know what to do with it. I google-d "strawberry recipes". I found this nice recipe from Laylita.com but her recipe had rhubarb in it and I had no idea what rhubarb was. I believe it is some soury taste fruit. (I should find out but could not bother knowing how limited Singapore markets are). Then I found many others, some I like part of it and some other parts of the baking process. And so I decided to amend recipe here and there.

I made this before I came across my favourite go-to short crust recipe which was in my Pate Brisee post. So the short crust pastry in these empanadas was slightly crumbly.

I also hate that I did not take the full baking process of these lovelies. I promised myself, I would re-do the new version of this recipe soon.

At the mean time, here is what I have done.


 Strawberries & Cream Empanadas
( Twist and twitch by Charm Bakes )

Ingredients:

15 medium or 25-30 small sweet empanada discs made from basic sweet pastry dough

1/4 cup cream cheese ( I will change this to 1/2 the next time )
2 tblsp brown sugar

3 cups chopped strawberries
1/2 cup sugar
1 tbs orange juice

1 egg (slightly beaten )
1/2 cup demerera sugar for sprinkling ( I used coarse grain )

Directions:

Combine the strawberries, sugar and orange juice in a large bowl, mix well and let rest for an hour. Drain the liquid from the strawberries.


Preheat the oven to 375 degrees.

Blend the cream cheese and brown sugar together, then fold in the strawberries. Do not over mix it as you will crush the strawberries. 
Fold the empanada discs and seal the edges, use a fork to help seal the empanadas, then lightly brush the top of the empanadas with the egg yolk; this will give them a nice golden glow when baked.

Sprinkle the demerara  sugar on the top of the empanadas. Chill the empanadas for at least 30 minutes, this will help them seal better and prevent leaks. But my strawberries are stubborn - they forced themselves out of the crust.

Bake the empanadas in a pre-heated oven at 375 F for 30 minutes or until golden.


This is so good that you can eat it on it's own!

I will try this again with step by step guide the next time. That will be when a friend of mine comes back from Korea and bring me a full carton of fresh strawberries..

Soon hopefully!

Monday, February 20, 2012

Chocolate Crinkles


I love this super chocolatey taste! This is definitely for chocolate lovers as the recipe has a good amount of chocolate inside compared to any other cookie.

I love the rustic but elegant look of this cookie. I would likely call it Chocolate Crack cookies as exactly how it would look once bake.

Chocolate Cracks Cookies ( wow! I really like how it sounds like )  are deliciously soft, fudge-like cookie that are encased in a generous coating of powdered sugar. The covered powdered sugar "crinkles" or "cracks" as the cookies bake, revealing a little of the chocolate underneath. 

 I love to eat these Chocolate Crinkles warm from the oven when they are so wonderfully soft and just seem to melt in your mouth.


Chocolate Crack Cookies
from joyofbaking
(Makes about 3 dozen)

4 tablespoons (56 grams) unsalted butter
8 ounces (230 grams) semisweet chocolate, coarsely chopped ( I used Hersheys )
1/2 cup (100 grams) granulated white sugar
2 large eggs
2 teaspoons pure vanilla extract
1 1/2 cups (195 grams) all-purpose flour
1/4 teaspoon salt
1/2 teaspoon baking powder

Topping: (needed after the dough has been refrigerated)
1 cup (110 grams) confectioners (powdered or icing) sugar, sifted


Directions:
In a heatproof bowl, placed over a saucepan of simmering water, melt the chocolate and butter. Remove from heat and let cool to room temperature.

In the bowl of your electric mixer, fitted with the paddle attachment (or with a hand mixer), beat the eggs and sugar until thick, pale, and fluffy (about 3 to 5 minutes). It will be right consistency when you slowly raise the beaters the batter will fall back into the bowl in slow ribbons.

 Then beat in the vanilla extract. Add the cooled chocolate mixture and beat until incorporated.

In a separate bowl whisk together the flour, salt, and baking powder. Add dry ingredients to the chocolate mixture, stirring just until incorporated. 

Cover with plastic wrap and refrigerate until firm enough to shape into balls (several hours or even overnight, I did mine overnight and so I made a few batches).
The next day.
Preheat oven to 325 degrees F (165 degrees C) and place rack in center of oven. Line two baking sheets with parchment paper.

Place the sifted confectioners sugar in a shallow bowl. First, form the chilled dough into 1 inch (2.5 cm) balls, and then roll each ball in the sugar. Make sure each ball is completely coated, with no chocolate showing through. Place the sugar-covered balls on the prepared baking sheet, spacing about 2 inches (5 cm) apart.

Bake cookies for about 8 to 10 minutes or just until the edges are slightly firm but the centers are still soft. (For moist chewy cookies do not over bake. Over baking these cookies will cause them to be dry.) 

Remove from oven and place on a wire rack to cool. These cookies are best eaten the day they are baked.

Reminder Again!!

The cool part is that as the cookies bake, they spread, making cracks in the white sugar which gives you a glimpse of the soft chocolate cookie underneath. 
Do not over bake these cookies or they will be dry. And that is not how we want them, we want them to be nice and soft.


I love to eat these cookies warm from the oven so, if possible, make them shortly before serving.


They can be stored for a day or two in an airtight container, that is, if they last that long.


Remember that it is supposed to be chocolatey, fudgy and chewy.. :)

Lots of love,


Friday, February 17, 2012

Warm Blueberry Muffins

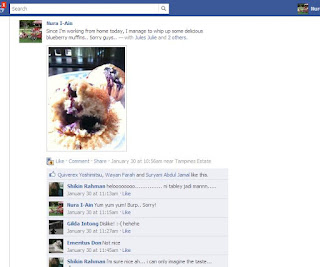
I was on working from home 1 day and I thought of the easiest , non-complicated but satisfying breakfast that could last me till after lunch. I open up the refrigerator and saw some left over blueberries which I had used most of them for the last galette orders.

What could be more delicious than a simple blueberry muffin in the morning served with English breakfast tea. That was just perfect for me. I could bake these withing 30 minutes.

Well yesterday my favorite niece tagged me a photo of her bakes and it was a scrumptious looking blueberry muffins topped with chocolate chips.

That was when I remembered I have not posted this easy recipe out.

Muffins are already sweet and so having bursting blueberries inside adds natural slight sourness which acts as a contrast to the sweetness. Ain't that delicious?

Just look at those juicy blueberries& fluffy muffins! 
Blueberry Muffins
from Noobcook
makes about a dozen (12) of a standard size cupcake/muffin liner

- 1 1/2 cups* (190g) plain flour
- 1 1/2 eggs, beaten
- 1/2 tbsp baking powder
- 1 cup (225g) caster sugar
- 150g blueberries
- 1/2 cup (125 ml) milk
- 1 tsp vanilla essence
- 65 grams butter, softened

* Cup refers to US cup measurement

Directions

1. Sift flour, baking powder and sugar together, and mix well.


2. Add in milk, vanilla extract, eggs and butter and stir until just blended (and lumpy). Be careful not to over mix as it will result in a tough texture.


3. Fold in the blueberries into the mixture. Place baking cases in muffin tins. Spoon the mixture into the cases till almost full.


4. Bake for 20 minutes in preheated oven of 200C (400F) or until slightly golden brown. Allow to rest for several minutes before serving. Store for a day in an airtight container. .
Otherwise it would just be gone when there still warm. :)

Right after I baked these goodies, I just had to tempt my team mates who are in the office.


And of course.. Cause of this I ended up baking these freshly the next few days for them.

Happy trying!


Lots of love from,

Sunday, February 5, 2012

Sables ( French Butter Cookies )

I love butter!

Sables which are also known as French Butter Cookie is your no ordinary butter cookie. The egg-glazed top with a criss-cross score on each tops makes it elegant compared to any normal butter cookies. It's a French thing.

I tried out this recipe I found from Joy Of Baking and it's simple, buttery and it's my go-to butter cookies. It's stated that it matters what butter you used as it is a BUTTER cookie after all. So for this recipe I go for Lurpak, the best we have here in Singapore. Original vanilla extract needed but I replaced it with Vanilla beans instead.


Sables ( French Butter Cookies ) from joyofbaking
Makes 3 dozen

140 grams unsalted butter, room temperature ( the best butter you can find )
100 grams granulated white sugar
1 large egg
1/2 lengthwise vanilla bean
260 grams All purpose flour
1/2 teaspoon baking powder
1/4 teaspoon salt
Egg Wash:
1 large egg
1 tablespoon water

Directions:

In the bowl of your electric mixer (or with a hand mixer), beat butter and sugar until light and fluffy (2-3 minutes).  Add the egg and vanilla bean and beat until blended. 

In a separate bowl, whisk together the flour, baking powder and salt.  Add the flour mixture to the butter mixture and beat just until incorporated. Do not over mix the dough.

Transfer the dough to a lightly floured work surface, knead the dough a few times to bring it together, and then divide the dough in half.  Wrap each half in plastic wrap and refrigerate until firm (at least an hour). 

Preheat oven to 350 degrees F (177 degrees C) and place rack in the center of the oven.  Line two baking sheets with parchment paper and set aside.

Remove one portion of the dough from the refrigerator and place on a lightly floured work surface.  Roll out the dough until it is 1/4 inch (1 cm) thick.  Using a lightly floured 2 inch (5 cm) round fluted cookie cutter, cut out the cookies, placing them on the prepared sheet. 

Place the baking sheet of cut out cookies in the refrigerator for about 15 -20 minutes to chill the dough. 


Meanwhile, in a small bowl, whisk the egg with the water for the egg wash. 


Remove the cookies from the refrigerator and brush the tops with the egg wash.  Then, with the tines of a fork (or I like to use the end of a toothpick), make a crisscross pattern on the top of each cookie. 


Bake cookies in the preheated oven for about 12 - 14 minutes (depending on size of cookie) or until golden brown around the edges. 


Cool cookies on wire rack. Store in an airtight container for up to a week. 

Hope y'all love it!